Home and Garden

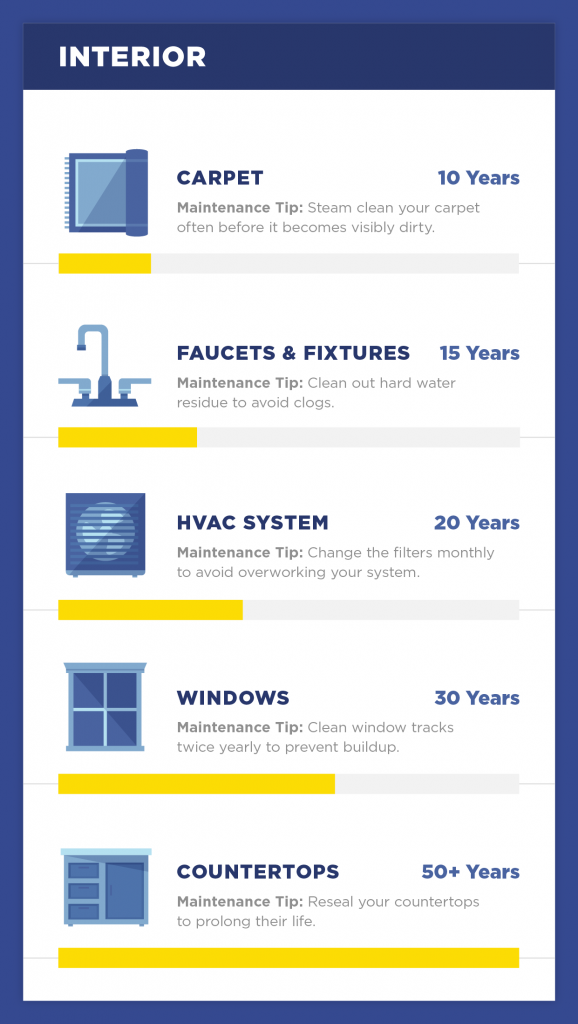
Tips for Amazing Outdoor Holiday Lights

Who doesn’t love piling the family into the car and driving around to view the holiday lights? For many of us, it’s an annual tradition. But when it comes to installing your own decorations, it can sometimes be difficult to find the motivation! (Especially when it’s -20 outside and the snow is falling.) We’ve put together a few tips that ought to make things easier this year!

Test your lights before you get started.

via GIPHY

It might seem like common sense, but sometimes people are so eager to get started that they start hanging lights and hours later find out that the one of the strings they’ve been working with doesn’t work. Do yourself a favor and do a plug-in test before you begin. Although no one likes doing the prep work of untangling huge clumps of twinkle lights, you’ll save yourself time in the long run.

Use outdoor-rated supplies outdoors.

Make sure you’re using lights rated for outdoor use. Otherwise you might find yourself with decor that fizzles out halfway through the season. It’s important to make sure your extension cords are intended for outdoor use as well.

Safety first.

via GIPHY

If you need a ladder to complete your decor, be sure to use one that’s sturdy. Don’t be tempted to risk life and limb by getting creative when it comes to reaching new heights. Be careful on roofs that might be icy or slick too. And when stringing those lights, don’t use nails or staple guns. The best way to hand electrical wires is with light clips or even electrical tape.

Start Small.

via GIPHY

It’s easy to get caught up in the spirit of the season. But don’t get ahead of yourself when planning your decor. It’s better to finish your decorating plan in stages than to try to do everything at once. Otherwise you might run out of steam or supplies and end up with a house that looks half done.

Be Creative.

via GIPHY

With all of the options available on the market, shoppers aren’t limited to simple strings of lights. There are inflatables, LED lights, net lights, icicle strands, and so many more choices. It’s easy to get carried away! Just make sure you’re not overloading your circuits. No one wants to pull a Clark Griswold.

Clean Up After Yourself.

By the time the holidays have passed it’s tempting to yank the lights down and toss them in a box until next year. But if you spend the extra time to organize things as you put them away, you’ll be ready to go next year. Strings of lights can be wrapped around a piece of cardboard or an empty paper towel roll. Mark things clearly so they’ll be easy to find and you’ll be ahead of the game when next November rolls around.

How about you? Do you have any tips on holiday lights to share?

We hope your holidays are filled with a little extra shimmer and shine this year!


How to Make Your House Smell Delicious Over the Holidays

Ready or not, the holidays are upon us. Cold temps and winter weather mean we’ll be spending more time indoors. With our homes sealed up against the elements, that means we could be at the mercy of pet odors, lingering cooking smells or something even worse.

Whether your home is for sale during the holidays or you just want a breath of fresh air, the following tips and tricks will make sure your house smells delicious over the holidays.

Pop Something in the Oven

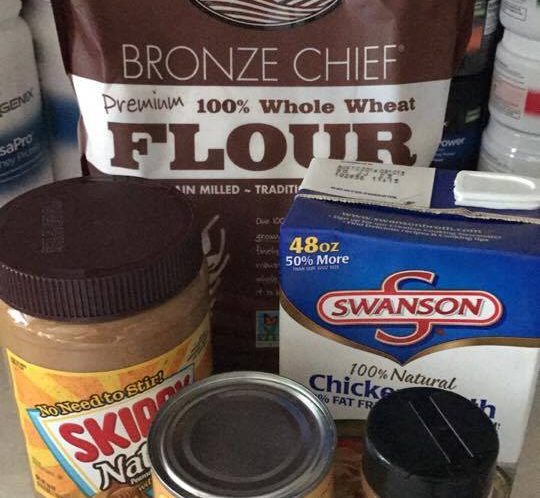
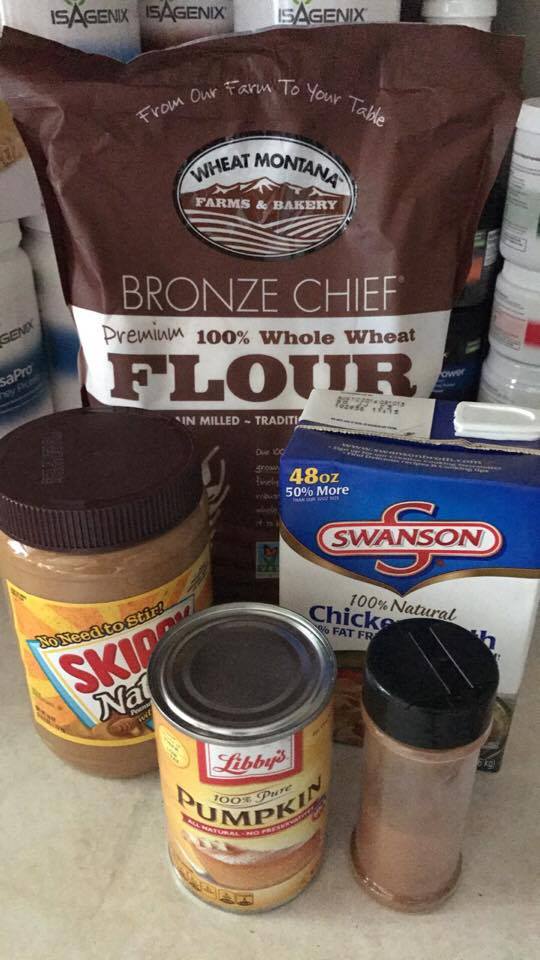
If you have friends or a scheduled showing, whip up a batch of cookies and pull them out of the oven right before your guests arrive. You don’t even have to make them from scratch. Keep a tube of refrigerated cookie dough on hand or better yet, make cookie dough ahead of time and freeze it so you can toss it into the oven at a moment’s notice. Chocolate chip is always a favorite, but around the holidays you might want to try a little gingerbread.

Diffuse Essential Oils

Essential Oils
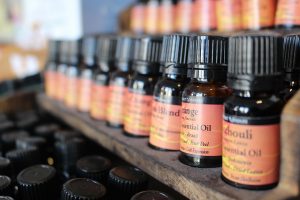
Essential oils not only smell great, they can also be therapeutic. With a minimal investment in a diffuser and a few oils, you can keep your home smelling fresh all season long. Many companies sell essential oil blends that are already mixed and ready to use. If you decide to blend your own, there are recipes online or you can use one oil at a time. Some of our favorites for the holiday season are scents of wintergreen or pine. Peppermint is always refreshing and also can help boost your energy and concentration.


Simmer Something on the Stove

Simmer Potpourri
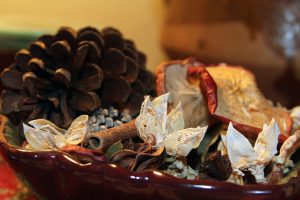
If you’re short on time and need to work with what you’ve got on hand, you can toss a few aromatic ingredients in a saucepan full of water and simmer any odors away. Traditional blends include oranges, cinnamon sticks, and cloves. You can also try slices of lemons with sprigs of fresh rosemary. Infuse new life into potpourri by adding water and letting it heat up on the stovetop. And if your fridge is empty and your pantry is bare, you can always mix some vanilla extract in water. Bring it to a boil then turn it to low and pretty soon your whole house will smell like the inside of a vanilla bean.

Decorate with Scented Pine Cones

Scented Pine Cones
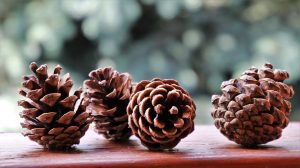
If you’ve walked down the aisle of a craft store this time of year, you’ve probably smelled the cinnamon-y, spicy scent of holiday pine cones. Pick up a bag of those and spread them throughout your seasonal decor for an instant boost of holiday cheer. Or you can make your own scented pine cones by adding pine cones and 20-30 drops of essential oils to a gallon-sized bag. Let it sit for at least 24 hours, although several days is even better. For scents, you can use a mix of cinnamon, evergreen, pine, clove, or anything else you’re drawn to.

With the tips above your home will smell delicious through the holiday season and beyond. Do you have any tips we haven’t mentioned? Share them in the comments below!


BOO Your Neighbors!

Have you ever been BOOed?

We’re not talking about being booed because you wouldn’t kiss your sweetie on the Jumbotron… we’re talking about a Halloween tradition that’s been sweeping the nation… BOOing your neighbors!

Here’s how it works… anyone can start the Boo chain. All you have to do is make up a sign or print the one we’ve provided below, gather some Halloween goodies or treats, then secretly drop them off to a friend or two. They’re supposed to keep the chain going. We’ve been doing this in our neighborhood for years. Sometimes we start the boo chain, other times a sneaky neighbor will beat us to it. You don’t even have to stick to your neighborhood. BOO a business! Take the BOO chain to a neighborhood where you don’t know anyone and start the tradition there. Let your kids BOO a few apartments in an assisted living facility or retirement community. The residents especially enjoy it if the kiddos come in costume. Just check with the staff first to make sure it’s okay.

The real fun is in spreading the holiday cheer from house to house. Our whole family gets involved. The girls love to help put together the baskets and goodies. But their favorite part is ringing the doorbell and running away before they get caught in the act of BOOing! After the chain has been going for a few days we love to drive through the neighborhood and see all of the “We’ve Been BOOed” signs hanging in doors and windows.

If you need ideas on what you can BOO your neighbors with, we’ve got plenty:

  • A basket of Halloween themed goodies like spider rings and candy
  • A gallon of cider and the ingredients to make Property Geek Sarah’s Double Duty Apple Cider
  • Homemade cookies
  • Pumpkins!
  • A Halloween decoration or two
  • Glow in the dark necklaces or flashlights for Trick-Or-Treating
  • Ingredients to make Halloween-themed s’mores with ghost-shaped marshmallows
  • A tube of slice and bake Halloween cookies along with a jar of sprinkles or can of frosting
  • A bag of apples and a jar of caramel for dipping

There’s also an adult twist for the game. Not only can your neighbors be BOOed, they can be BOOzed as well. Add a bottle of caramel vodka to the goodie basket or drop off a bottle of wine or six-pack of Oktoberfest beer.

And if all of your friends and neighbors have already been BOOed or BOOzed and you need someone to keep the chain going… feel free to stop by The Property Geeks office in downtown Lakeville!

Happy BOOing!

Download here

Download here

25 Super Smart Storage Ideas

As summer winds down it’s the perfect time to get your house into back-to-school shape! Here are some refreshing and unique ways to improve your storage around the home. These tips are organized by room. We hope you find something useful!


FOR THE KITCHEN


1. This appliance lift is an easy way to manage space and convenience for big items in your kitchen.

2. A slide out rack can smooth over your pot and pan storage.

Via Oddity MallE

3. Faux drawers are a waste of space. Make them useful with some functional, pull out drawers.

4. You can’t get much more functional with storing an IKEA ironing board than this.

5. You can store bread and root vegetables at room temperature. Drawers like these are easy ways to store them out of sight, and keep pests off.


BATHROOM


6. You can store your hair tools in a specially made drawer, like this one.

7. Does your sink just not have enough room? A simple sink shelf can do the job.

8. This skinny bathroom floor cabinet is perfect for tiny bathrooms.

9. Tired of having your toilet brush and plunger limiting the appeal of your bathroom floor? Utilize the negative space in your wall with a Hy-dit cabinet.


BEDROOM


10. Store that dog bed away easily with a platform bed drawer.

11. Keep that smelly footwear safely tucked away in this lovely ottoman.

12. Have that special TV you need to safely hide away when not in use? Learn more about this table here.

13. See how The Girl on the Go hides her jewelry behind a full length mirror.

14. Put shoe store displays to shame, like a’ so.

15. What are tonka trucks if not a young (very) man’s tools? It only makes sense to store those and other manly toys on pegboard.

16. Always in a rush to get your kids to dress themselves in the mornings? Some well labeled drawers can help.

17. You can never have enough organization with kids.

These thin closet shelves for books and small toys are great for keeping things out of sight, while leaving plenty of closet space to use.

18. For the OCD, future architects among us.


OFFICE


19. Are you a photography buff? This kickstarter project has a genius lens rack that is just calling out for you.

20. You can use this cord hub to make power strip and cord storage so much more efficient.


GARAGE


21. This motorized bike storage rack is pure genius.

22. You’ll be thanking Popular Woodworking for this amazing tape storage DIY.

23. Who knew towel racks could be repurposed as trash bag holders?

24. Your wee ones deserve a garage too! It’s easier to construct than you might think.

25. This genius pegboard system is something any handyman could use. Learn to make it here.

5 Types of Outdoor Furniture That Last

As summer heats up, you’ll want to make sure your patio furniture is in tip top shape to maximize your enjoyment of the great outdoors. But what if you settle onto that furniture and hmmm…it doesn’t look nearly as nice as it once did? Well, you’re in luck because today there are dozens of choices for new outdoor patio furniture that will have your outdoor living spaces looking and feeling cozy and welcoming for both you and your guests.

Your choice in outdoor furniture is important, as you probably spend a lot of time on it during the summer months. It makes sense, then, to choose comfortable styles and fabrics, while still keeping in mind the care and maintenance needs of furniture. The first thing you should do is think about how you use your outdoor areas. Do you hold big parties for many people, or do you have more small, intimate cookouts? Do you do most of your cooking outdoors during the summer? These are important questions to ask when you’re considering new furniture purchases.

Below we have categorized a few of the most attractive choices for patio furniture, both by aesthetics and by their ease-of-maintenance. Use this as your guide when you go shopping.

1. Wrought Iron Furniture

Wrought iron is classic, sturdy, and timeless-looking. If you live in an area of high winds, you won’t have to worry about your patio furniture blowing away. There are so many styles, colors, and designs with wrought iron that it is sure to fit your style, no matter what that might be. But don’t plan to use this type of outdoor furniture if you’ll be moving pieces around a lot. They are hefty and will leave marks if dragged across the deck.

Because the paint on wrought iron can chip, see if there is a touch-up paint in the same color available to purchase when you buy your set of furniture. You’ll be able to use the touch up anytime you find scratches or chips, and it’ll keep your furniture looking like brand new. To clean, just wipe down with a damp cloth. If deeper cleaning is necessary, wipe down with a solution of dishwashing detergent and warm water, and then rinse with your garden hose.

2. Aluminum Furniture

Aluminum patio furniture is great if you want an easy-care solution that you can effortlessly move around. Aluminum won’t rust, and it’s super lightweight. Choose cushions that you can easily replace, as the aluminum frame will probably significantly outlast your cushions. When you’re shopping, make sure that the hardware on your furniture is rust-proof, and choose a powder-coated, UV-resistant finish. Check the welds to make sure they are seamless, and look sturdy.

To clean aluminum furniture, just wipe it down with a damp cloth. If you see scuff marks, you can very gently use a bit of Soft Scrub on a soft, damp cloth, but be careful – you don’t want to scratch the finish, especially if it’s shiny. And never use abrasive cleaners on aluminum. Rinse off with your garden hose.

3. Polymer and Plastic Furniture

If easy care and maintenance are what you’re looking for, synthetics are where it’s at. Plastic patio furniture created from recycled plastics are fantastic if you live in a saltwater environment. This furniture can’t ever rust and is designed to last in difficult environments. Marine-grade polymers can also be used. They’re heavy, sturdy, and have been designed to look just like painted wood. You can leave this furniture out all year round without any ill effects, and cleaning is easy with a simple dish soap and water solution and a damp cloth. Rinse with your garden hose.

4. Real Wood Furniture

The type of wood your furniture is made of is crucial if you want to avoid things like splitting, rotting, and bugs. You want dense wood such as teak or eucalyptus, or a hardy wood such as cedar. Teak and Eucalyptus are easier to maintain because they don’t need to be sealed on a yearly basis, but cedar is naturally moisture- and bug-resistant.

Clean your wood furniture with a soft brush and a solution of water and Murphy’s Oil Soap. Hose down well and dry with shop towels.

5. Cushion Fabrics

Choosing new cushions is a great way to make older furniture look new again. They can also be the most pricey part of your patio set, so make sure you choose wisely!

If price is no object, look for fabric designed for outdoor use that is UV-resistant, as well as resistant to moisture, mold, and stains. And bring your cushions indoors when you’re not using them – you’ll get much more life out of your investment.

Q&A on Radon

A Quick Q&A on Radon

What is radon?

According to the Minnesota Department of Health…
Radon is a colorless, odorless radioactive gas that seeps up from the earth. When inhaled, it gives off radioactive particles that can damage the cells that line the lung.

 Where does it come from?

Radon comes from the ground. Most soil contains traces or uranium. As the uranium breaks down over time, it turns into radium. Once the radium disintegrates it releases radon gas that rises into the air we breathe.

 Why is it a problem?

Although radon occurs everywhere, it’s most dangerous in places where it accumulates to high levels such as indoors. Radon is the most common cause of lung cancer in non-smokers and the second most common cause in those who smoke. Over 21,000 cases of lung cancer can be attributed to radon each year.

How do you know if you have it?

The only way to tell if you have radon is to perform a radon test. Test kits are available online and are simple to perform. A short-term test can take just a few days and a long-term test measures levels over a period of ninety days or more. Since radon levels can fluctuate greatly over time, most experts recommend a long-term test for the most accurate reading. It’s also best to test over multiple seasons.

What do you do if you’ve got it?

The good news is that mitigating a radon problem is a fairly easy and relatively inexpensive fix. In most cases you’ll want to hire a professional who’s licensed in radon mitigation. They’ll most likely install some sort of piping that will vent the radon from the lowest level of the home up and out of the attic. Even after your system is installed you’ll still want to check periodically to make sure the radon levels in your home stay below dangerous levels.


If you’d like more information about radon, check out these resources:
Minnesota Department of Health
U.S. Department of Health & Human Services
United States Environmental Protection Agency

The Lifespan of 20 Essential Household Items

Has your air conditioner ever failed on a hot summer day? It’s a struggle no homeowner wants to deal with. When you own a home it’s important to budget annually for repairs that might be needed and anticipate when things might need to be replaced.

If you take care of your home, your appliances and fixtures should last longer. This means keeping them clean, performing regular maintenance and preventing unnecessary wear.
Even the most well-kept homes will need repairs at some point and it helps to know how long you should expect your items to last. We’ve put together a list of how long certain household fixtures and appliances should hold up.

Check out each of the rooms below!

Exterior:

Fixtures outside your home can suffer the most wear and tear of anything you own because they are constantly exposed to the elements. However, they are usually some of the most sturdy and are typically built to last. These are the items you will likely have to pay more for but luckily not as often.

  • Window Unit Air Conditioner: 10 Years

The typical window unit air conditioner can last anywhere from 8–12 years depending on how much it’s used and how well it’s taken care of. Be sure to turn the unit off when it’s not needed and clean the air filter often.

  • Garage Door: 12 Years

You can expect 10–15 years of reliable service from a garage door depending on how often it’s used. To prolong its life, apply lubricant spray to door springs every three to six months.

  • Siding: 30 Years

Siding can last anywhere from 20–40 years depending on the material used, weather conditions in your area and how well it’s taken care of. For instance, aluminum siding will last 15 years but needs to be repainted when it fades every five or so years.
Wood siding that is painted or stained every five years should last decades. But vinyl siding is a popular choice because it can last up to 40 years and is virtually maintenance free!

No matter what material you use to keep your siding clean to prevent dirt and mildew that can shorten its lifespan.

  • Roofing: 25 Years

Most homeowners will need to re-roof their house every 20–30 years, although the type of shingles you use will impact this number. A metal roof can last even longer, up to 50 years, although it’s more expensive upfront and therefore less common.

To get the longest life out of your roof ensure you check it after inclement weather and be sure to repair it quickly to avoid more damage.

  • Deck: 35 Years :

Depending on the type of wood, your deck can last anywhere from 20–50 years. However, the average deck lasts around 35 years.

Seal your deck and keep up with minor repairs to keep it strong and sturdy for many years.

Interior:

Maintaining the interior of your home can keep it looking stylish and new. Even the most diligent cleaners will at some point have to replace worn out fixtures. Doing so proactively can help you avoid an emergency situation.

  • Carpet: 10 Years

Carpet in your home typically has a 5– 15-year lifespan. It will eventually begin to wear out (in the most traveled areas) and it will need to be evaluated. If you notice it’s starting to look dirty, matted or has a foul odor, it’s time to replace it.

It’s a maintenance best practice to steam clean your carpet often (before it becomes visibly dirty).

  • Faucets and Fixtures: 15 Years

Properly cleaned and maintained faucets and fixtures can last anywhere from 10–20 years. However, if they are not properly cleaned they can last less than 10 years. If you want to make them last, clean out hard water residue often.

  • HVAC System: 20 Years

It’s best to replace your system around 15 years which means saving up the money and having a professional in mind to fix it.

To get the longest life out of your HVAC change the filters often to avoid overworking your system.

  • Windows and Skylights: 30 Years

Windows and skylights last so long that often people forget they need to be replaced at all. Good windows will last most people from 25–35 years or more, but you will know it’s time to change them when they start looking warn, begin to suffer damage or are not insulating your home properly.

Be sure to clean window tracks twice yearly to prevent buildup and prolong their life.

  • Countertops: 15-100+ Years

It’s smart to invest in stone countertops such as granite or quartz because they last so much longer than laminate or cement countertops. Laminate countertops will last anywhere from 10-12 years, while a well-maintained stone countertop can last over 100 years!

Keep your investments safe by avoiding contact with hot surfaces or cutting directly on them. Reseal your stone countertops often and they can last a lifetime.

Appliances:

The appliances in your home are some of the easiest things to fix and some of the more inexpensive to replace. While some people replace appliances as newer technology emerges, it’s most cost-effective to use them for the duration of their lifespan.

  • Microwave: 9 Years

A microwave can last a long time if properly cared for. Usually, they last anywhere from 5–15 years and sometimes even longer depending on usage. When using your microwave, clean it often and avoid slamming the door. Never run your microwave without something inside, as it can cause serious damage.

  • Dishwasher: 10 Years

Depending on the make and model, a dishwasher can last anywhere from 7–12 years. If you start to notice your dishwasher isn’t washing well, give it a good cleaning before giving up on it.
To properly clean it, unscrew the drain and clean the filter monthly to prevent clogging. Once the filter is clean, empty the dishwasher completely (racks and all) and running it with a cup of distilled white vinegar inside it.

  • Washing Machine: 12

The average washing machine lasts between 10–15 years depending on the brand and how well it’s maintained.
To stretch its usable years further, check your washing machines water hoses for signs of wear or weakness a few times each year.

  • Dryer: 12 Years

Similar to your washing machine, your dryer should last anywhere from 10–15 years. If you buy them together, they likely will be ready to replace around the same time. If you notice it’s making strange noises or emitting strange smells, it might be nearing the end of its life.
A good maintenance best practice is to clean your lint trap before every drying session.

  • Oven: 14 Years

Ovens these days will last anywhere from 10–20 years. Don’t wait until you start ruining meals to replace your oven.

To ensure it’s running properly, inspect coil burners for deformities and replace any damaged ones.

Miscellaneous:

There are other household items that may not necessarily be fixtures or appliances but are important and should be maintained nonetheless. Things like your mattress and sprinkler system are more obvious because you use them often. However, smaller things like smoke alarms, fire extinguishers and electrical wiring can cause damage if not properly maintained, so it’s important to keep your eye on them.

  • Mattress: 8 Years

Your mattress is typically used more than most other things in your house and can collect dirt, dust and grime. It’s important to get a new mattress if yours starts to look or smell dirty, or if it’s losing its firmness.

Most people get a new mattress every 7–10 years which is a good rule to follow. Make your mattress last longer by rotating it 180 degrees from head to foot every two to six months.

  • Smoke alarms: 9 Years

Three out of five home-related fire deaths occur in a house that has malfunctioning smoke detectors. It’s important to not only replace batteries every year but to replace the detectors and alarms every 8–10 years.

  • Fire extinguisher: 10 Years

It can be tough to tell how old your fire extinguisher is if you didn’t buy it yourself as some don’t have expiration or purchase dates on them.

A good way to tell if it’s working properly is to check its pressure gauge monthly to ensure the needle is in the green area of the pressure scale. If it’s damaged, has low pressure or you think it might be older than 10 years, it’s probably best to replace it.

  • Sprinkler System: 20 Years

If you’re lucky enough to have a good quality sprinkler system it can last you anywhere from 10–30 years! Take good care of it to ensure you’re on the high end of that scale. Get your backflow checked annually and drain the system of water during the winter if you’re in an area that freezes.

  • Electrical Wiring: 100+ Years

Old wiring can cause serious safety issues for you and your family. The good news is that wiring systems can last a lifetime if properly maintained. Buy an electric socket tester and routinely test your electrical outlets’ voltage.

If you start to notice low voltage, get a tingling sensation when you touch the walls, smell burning anywhere in your home or have ungrounded outlets around your house it might be time to replace it.

In general, as long as you properly maintain your appliances, fixtures and household items you should get fairly long lives out of most of them. If you also save the recommended 1% of your home’s value every year for repairs you won’t be blindsided when a costly repair does need your attention. Use this list to anticipate your product’s lifespans and enjoy stress-free home repairs.

Hug Your Home Challenge – January Tips

If you’ve been keeping up with The Property Geeks you’ve probably heard us talk about the 2018 Hug Your Home Challenge. It’s a chance for all of us to stick together through a year full of home maintenance tips and tricks. If you haven’t signed up, there’s plenty of time. Join in here! For those of you following along, we’re working through January’s list right now. It’s full of exciting things like “Clean Your Ceiling Fan Blades” and “Touch Up Interior Paint.” If you’re like us, you know those things are important to do, but not exactly the most desirable way to spend an hour of free time. We’ve got some tips here on how you can knock off a good portion of our checklist as quickly and easily as possible. Let’s start with the dreaded garbage disposal…

“Ooooh, What’s that smell?”

Ever notice a funky little smell drifting up from your kitchen sink? Maybe it’s that tuna melt sandwich you just put down the drain. Or maybe it’s time to show your hardworking garbage disposal some love. There are many ways to clean the garbage disposal and if you do a quick search on Pinterest you’ll be bombarded with options. Our best advice comes from Property Geek Karla who suggests the following:

  1. Slice up a lemon and send it down the disposal.
  2. Follow that with a cup of ice.
  3. Next, measure out a cup of vinegar and pour it down the sink.
  4. Presto! You’ve got a sweet-smelling disposal.


“Don’t Hit a Wall with the Walls!”

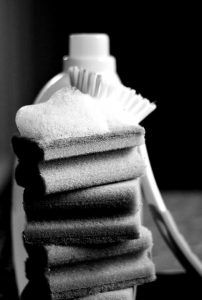
Do your walls and baseboards have a magnetic-like attraction to dust and grime? There are several different ways to fight back, depending on the level of effort you want to put forth. Here are a couple of ideas:

  1. Dust your walls with a microfiber mop.
  2. Mix up a batch of ammonia and water then wipe down the walls and baseboards with a damp cloth.
  3. Use a Magic Eraser for stubborn stains or marks but be careful — it might remove the paint finish.
  4. Use a toothbrush or cotton swab to get into the corners and tight spots on your baseboards.
  5. To cut down on future work, run a dryer sheet over your baseboards. It will repel dust.


“Shower your Shower Curtain with Love”

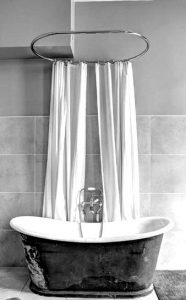
Do you ever get the feeling it would be better to go with a gray shower liner instead of battling the mildew that collects on that once-pristine white one? The battle against mildew and mold can be won. Just wash your shower curtain with salt. Salt? Yep. Regular table salt will do the trick. Here’s how:

  1. Toss your shower curtain, liner and a couple of towels into the washing machine.
  2. Use 1/2 the amount of detergent and toss in a cup of vinegar or use the regular amount of detergent with 1/2 cup of baking soda and 1/2 cup of vinegar during the rinse cycle.
  3. Add a cup of salt to a tub of water and soak shower curtain/liner for several hours.
  4. Hang to dry.
  5. No more mold and mildew!


Enjoying our tips? Sign up here for our 2018 Hug Your Home Challenge and get our annual checklist plus monthly reminders of “to-do’s.” You can also follow us on Pinterest where we’re pinning our favorite tips. And make sure you join us at 12pm CT on our Facebook page for #GrillTheGeeks. Every Thursday we talk about home buying and selling and answer your real estate questions. This week Property Geek Karla will be talking about more home maintenance tips you can use to knock off that January checklist!


Contract

Geek Speak: Home Warranties

What’s the scoop with home warranties? Are they important? Do I need one?

Unlike a manufacturer’s warranty that covers an appliance for a certain amount of time, or a homeowner’s insurance policy that protects a home against catastrophic damages, a home warranty provides coverage for day-to-day breakage due to normal use.

A home warranty doesn’t expire–the plan can be renewed year after year.  Coverage can extend from appliances like dishwashers and water heaters to whole-house systems such as plumbing and electrical. Terms and limits vary by company and some offer additional coverage for specialty items like pools or wells. One of the companies we work with even covers the cost of re-keying an entire home–a huge benefit for a buyer right after a move.

Who Buys a Home Warranty?

That depends. In a competitive market, sellers may include a home warranty in the purchase price of their house. If buyers have concerns about dated appliances, they might ask a seller to include the coverage as part of the purchase agreement. Home warranties can also be purchased directly by a homeowner. They don’t have to be part of a home sale.

Kitchen AppliancesTop 3 Reasons to Purchase a Home Warranty:

Peace of Mind for Buyers – As a buyer, there’s comfort knowing that if something goes wrong, you won’t be out the expense of having to replace or repair an item in addition to all of the other moving and closing expenses.

Attractive Advantage – If a buyer is undecided between properties, the addition of a bonus like a home warranty may provide the deciding factor between homes.

Limited Liability – With a home warranty in place, a seller won’t have to worry about an appliance giving out and having to come up with the extra funds for replacement while their home is for sale.

If you’d like more information about home warranties, contact on of the geeks or tune in for this week’s episode of Grill The Geeks on The Property Geeks Facebook page where we’ll be talking to a colleague of ours who works for a home warranty company. We broadcast live every Thursday at 12pm Central time. Hope to see you there!


Dog Days Biscuits

Dog Days in the Kitchen!

Dog Days of Summer
Property Geek Amy knows a thing or two about spoiling the ones she loves – especially if they’re the four-legged variety. With the summer real estate market being so crazy busy, Finn and Taz have been feeling a little neglected. To get back in their good graces Amy whipped up a batch of homemade doggy treats and she’s sharing the recipe!


Dog Days Biscuits

Puppy Pleasing PB & Pumpkin Bites
1 Cup Whole Wheat Flour
½ Cup Peanut Butter
¼ Cup Pureed Pumpkin
1 tsp Cinnamon
¼ Cup Chicken Stock

Preheat oven to 350 degrees. Stir together flour, peanut butter, pumpkin and cinnamon. Mix in chicken stock until well-combined. Transfer dough to a flat surface and roll to about ¼” thickness. Use a cookie cutter to cut out desired shape and place on an ungreased cookie sheet. Bake for 18 minutes until browned and firm. Let cool completely before storing in an air tight container.

Dog Days Biscuits

Do you spoil your canine companions with homemade baked goods? If you’re not in the mood to bake, check out some of our favorite local places to treat your pooch…

Chuck & Don’s  – Minnesota-based Chuck and Don’s has several locations throughout the Twin Cities, including a store in Lakeville. They sell food, supplies, treats and are dedicated to supporting the local community.

Wag n Wash – With self-serve dog wash tubs and a gourmet bakery, this is a one stop shop for everything your pup might need.

Just Dogs Gourmet – If you’re in need of a birthday cake or some of the cutest themed cookies we’ve seen, stop by one of their locations including the Mall of America.

Bone Adventure – A staple on the Twin Cities pet scene, this local pet store/bakery/grooming salon has been serving pets and their people since 1977.

Finn looks happy for now!

Dog Days Biscuits

Where are some of your favorite places to take your pooch for a treat?